

Priority for my visits during the Autumn was getting the garage fully watertight ahead of winter: doors on, cladding completed, soffits fixed. As always though, there was always more than one thing that I needed to focus on, so this went alongside various things going on in and around the house – not least airtightness tests, MVHR commissioning, a bit of kitchen unit building so that electrics could be completed, plus outside steps.
doors
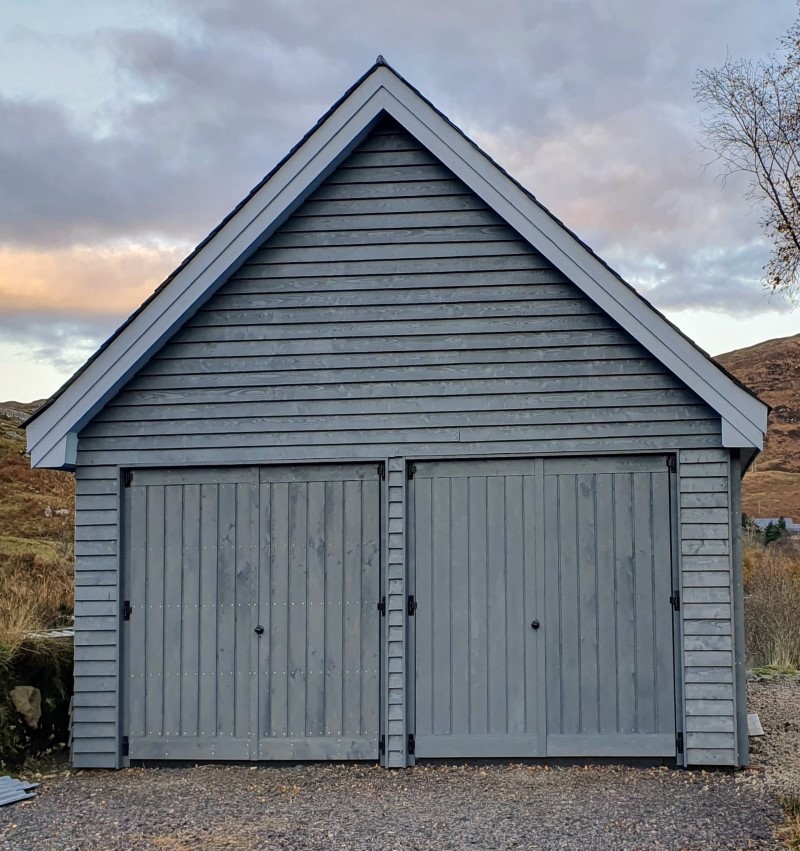
David (joiner) came back in September to help get the garage doors on. They seemed so simple when we’d talked about them: made from some 4x2s, a sheet of ply, membrane and then cladded, and fixed to the frame using three 600mm hook and band hinges per door. I should have learnt from the inside doors though that nothing about doors is simple! But we both adapted slightly how we’d imagined they would work, including different hinge positions (now underneath the cladding rather than on top), and different edge of cladding details (as doors and hinges were in slightly different position in opening than I had envisaged). David got the basic structure built and hung, with locks fitted, and then it was up to me to do all the finishing stuff.
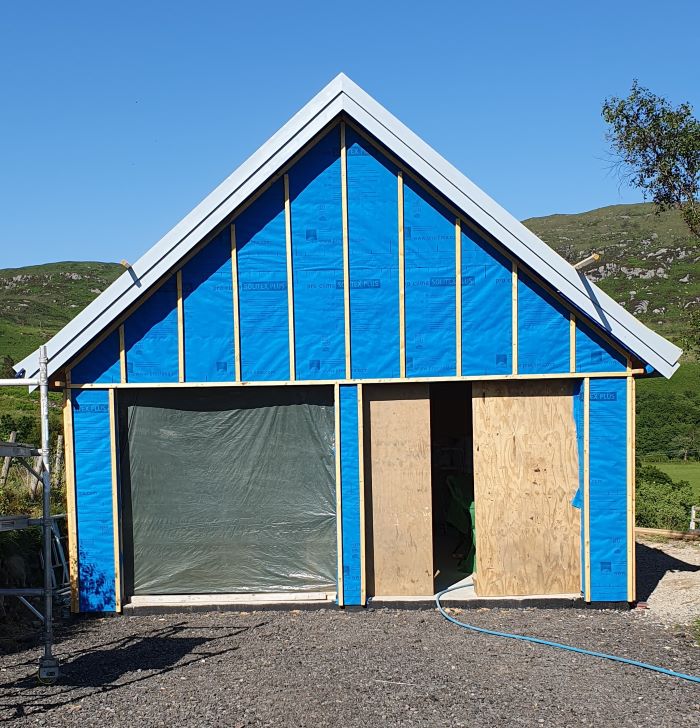
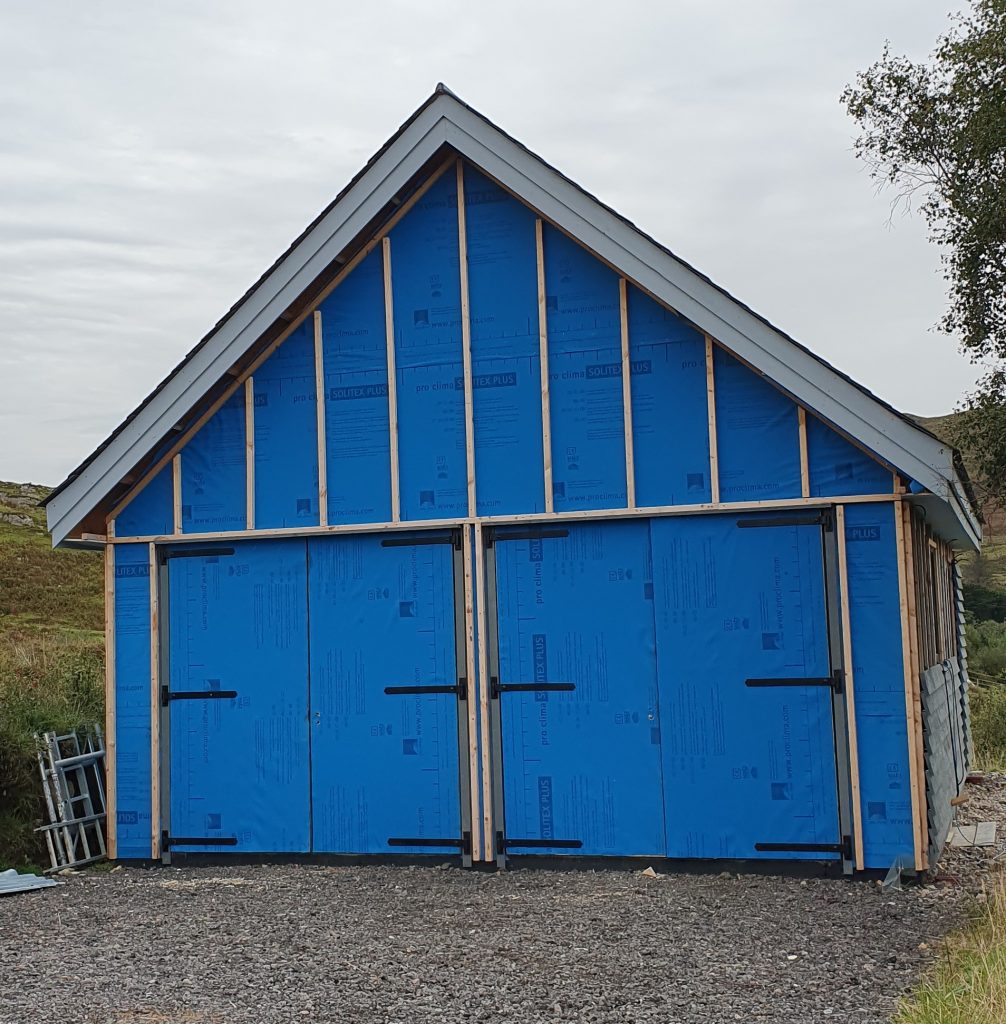
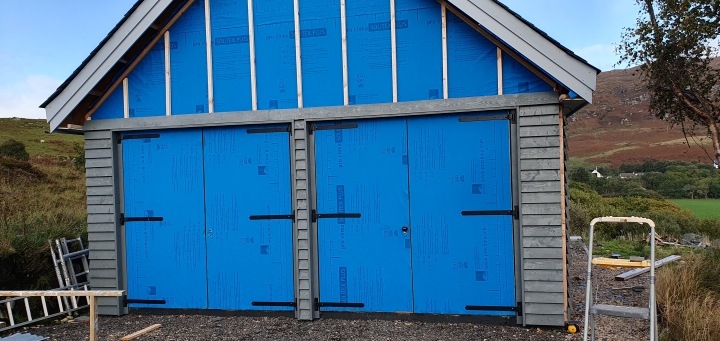
Having looked at a lot of pictures of garage doors, Steve and I had finally decided we liked the look of vertical boarding. Once again, of course nothing is ever that simple. We realised we needed to take account of boards shrinking and expanding in different weather conditions and so rather than just planks fixed next to each other, we would have to fix using vertical board-on-board construction. This then meant that the 25mm thick boards we had for the wall cladding would be way too thick (and heavy) to use. I was recommended to use a local saw mill to source the wood from, and so we’ve ended up with some thinner locally sourced larch from Salen. (In a quite nice association, when the power on the peninsula was turned off so that we could finally get our electricity pole taken down, the power outage was also timed with work that SSE had to do with Scottish Forestry, clearing some trees away from electricity lines in Salen – and these are the trees we are now using to clad our garage).
more cladding
Slowly over each of my three trips up during September, October and November I finished the doors and plodded on with the wall cladding – flitting slightly between the two, depending on weather conditions and what boards I happened to have painted at any particular moment.
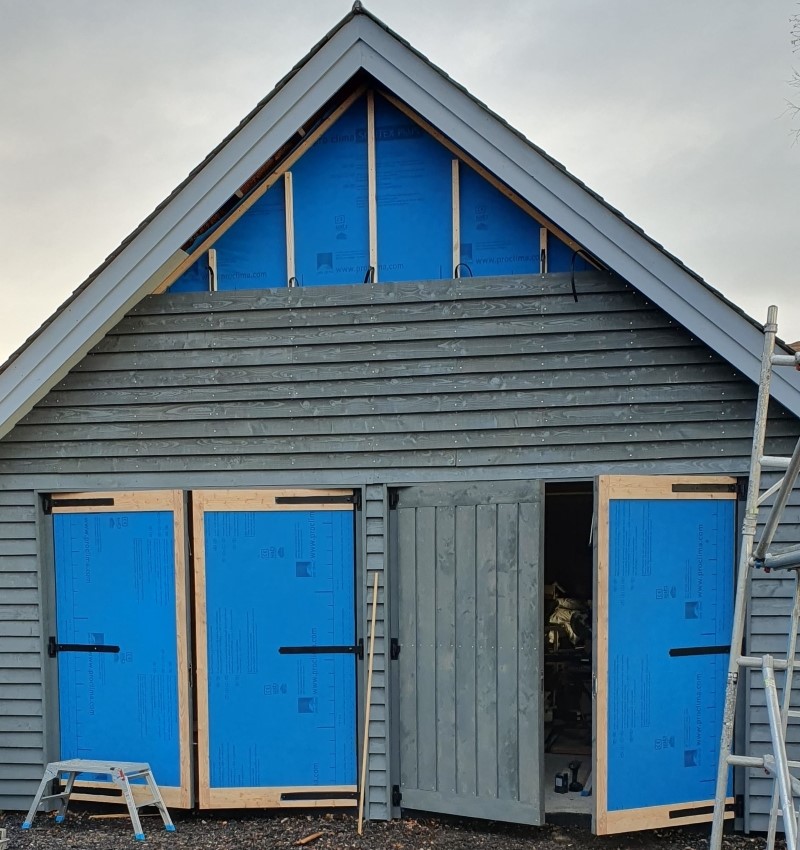
The cladding for the doors themselves took much longer than I’d estimated (again, you’d have thought I’d have learnt by now!). Each of the four individual doors involved:
– 21 individual pieces of wood cut and painted
– 3 back sections cut out totally to accommodate the hinge
– 3 back sections partially chiselled out so that they sat neatly over the centre hinge
– 3 top boards with a section cut out and small square chiselled from the back to accommodate the door bolt, so that it sat neatly on top
– approx 70 stainless screws
– key hole drilled out (square with the fitted lock)
– handle hole drilled out (square with the fitted handle)
– top board cut out around the handle
– door handle and escutcheon fitted
– bottom door stop board fitted
But finally they were done. And so were the soffits and cladding on the gable above it. And in an absolute bonus, the November weather was so good (I only needed a t-shirt on two of the afternoons), I managed to get the second coat of paint on all the gable, so I could take the scaffolding tower down.
I then used up the remaining painted boards (I was relieved that I ran out of paint, so there was a forced stop!) and got the first three rows of cladding on the final north side wall. As I was doing this, I reflected on how long it had previously taken me to get the first row of a wall started – about a day when we first started the house. This time it was a half hour job. Another of those tasks I’ve got reasonably proficient at just as I finish – and I’m sure will have totally forgotten how to do if I ever had to do again in the future.
house electrics finally signed off
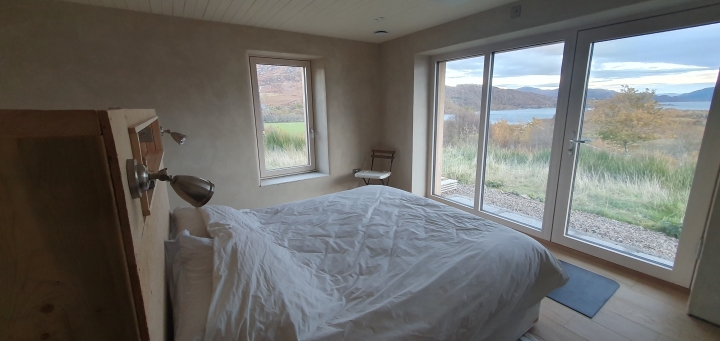
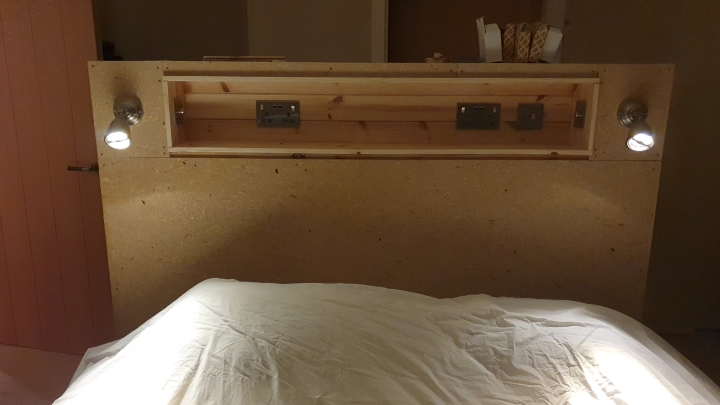
Like lots of house building things, there are always about 10 different things that need to be done before you can get to the actual job you thought needed doing. In the case of the electrics, whilst electrician Neil just hadn’t had the time to install the outside sockets, the two main outstanding things inside the house related to our over-sized bedhead (freestanding, that acts as a room divider) and the kitchen back-panel/’breakfast bar-shelf structure that runs from the wall to the post under the stairs.
The bedhead has been a long time in the making. After making the frame relatively straightforwardly, I then needed to find someone with an SDS drill so that we could drill holes in the slab to fix it in place. Then slowly it’s being finished off: shelf constructed – lined with tongue & groove boards – which will act as our bedside table; bedside lights sourced (nice secondhand Nepture lights found on Facebook Marketplace); and then finally boxes cut out for the various sockets and switches, so that Neil could wire everything up. At the same time, I also sourced some secondhand foam to make the soft part of the headboard. I discovered some material in the back of one of our cupboards to use for both the headboard and a blind – material that I bought years ago at a warehouse sale, that I knew I loved, but hadn’t quite found the right thing to do with it. I think Steve likes it…. or perhaps just doesn’t hate it! Now just need to get hold of some tongue & groove boards to cover the OSB, and paint it, and find some nice plank of wood to put on the top.
For the kitchen shelf structure, we had to wait until the post from the stairs was fixed in position before we could finalise the position of the kitchen units. Again one of those things that seemed like should be quite a simple thing to build, but it needed to house sockets, needed to attach to the floor as well as the kitchen units, needed to have a shelf in it on the front side so that didn’t look like too much of a boring slab from the hall. Plus it also needed to be totally vertical alongside the kitchen cabinets – this part I thought would be straightforward, but as we’d used a rustic pole to support the stairs, whilst it was vertical on 3 of the sides, the side that we need to butt up against is of course the one that’s slightly off vertical. We’ll just have to do some optical illusion stuff there! Whilst it’s now relatively secure in the right place, it isn’t yet fixed to anything – so that’s next job, once all the kitchen units are fixed together on the other side, and then more painted T&G, and wooden shelf on top.

