
I couldn’t put it off any longer: we finally had a date for our blown-in insulation and that meant the big 170mm ducts had to be put through the front wall before that happened. Just to make it a bit more challenging, the MVHR machine itself hadn’t arrived, so I just had to hope that all my measurements – above and below where the unit would sit on the wall – were absolutely accurate. Nothing like adding in even more challenge and potential jeopardy to an already pretty daunting job!
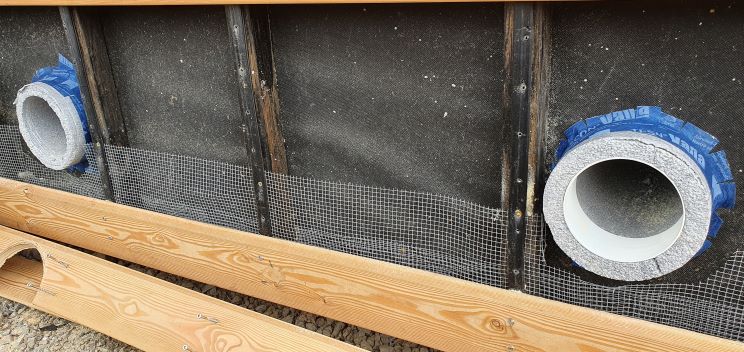
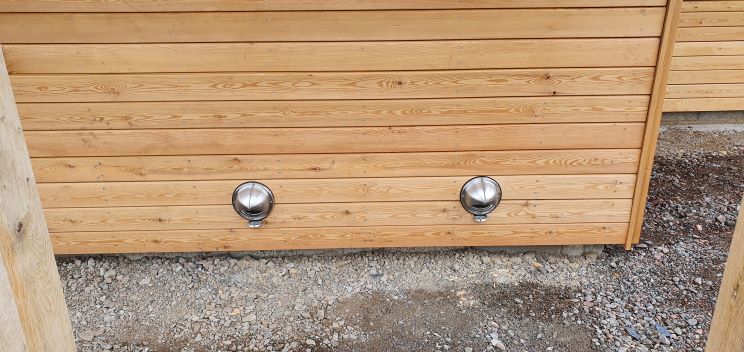
After a whole load of measuring, calculating, forgetting what I’d measured, checking instructions again, and generally wasting several hours (perhaps days) of my life, I really did have to make those holes in the wall. After drawing on the inside wall where I thought the ducts should go, checking that this made sense with the larch cladding boards on the outside, it was time to drill right through from inside to outside using the fairly massive 600mm x 10mm augur drill bit we’d bought for the purpose. The challenge was keeping the drill bit level and parallel to the i-joists as it went through the 400mm air gap between the interior Durelis board and the outer 80mm layer of Pavatex/woodfibre. Seemed to work ok, so then on to the 170mm hole cutter – first on the inside, and then outside cutting through the Pavatex (I decided I wasn’t quite brave enough to cut the larch as well at this point – save that excitement for another day). So once the hole was there, I had to to simply feed a tube made of polystyrene through from inside to outside – the ‘insulated duct’. The first duct worked like a dream! The second one… clearly I was slightly overconfident, and not careful enough about the level and parallel augur bit. It all worked in the end, and we now have two large openings through the front wall of the house.
Because that’s how things work out, when I returned 10 days later, ahead of the insulation being put in, the MVHR unit itself had arrived. So there was then a whole lot of pain painstakingly measuring to ensure that the unit went on the wall to the millimetre accuracy so that the ducts fitted precisely onto the outlets at the bottom of the unit. More measuring, scratching head, measuring again, marking out, measuring again… and fortunately I had the insulation guys on hand to help me lift the unit on – and off – the fixing bracket. Cracked it the 3rd time!
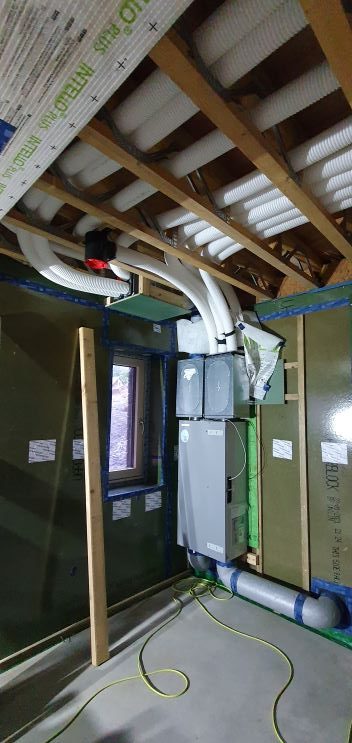
With the unit on the wall, it was then the silencer boxes. Two sat directly on top of the unit – not so hard. There was also a third one that went up – in theory – between the roof joists. On the joists plan, a gap of 450mm had deliberately been left between the last two joists above the MVHR unit to fit the unit in. Unfortunately, the day that the joists were installed, it was both extremely wet and there was an issue with the height of the walls meaning that gaps between joists wasn’t top of mind for the builders. Needless to say, that different 450mm gap was missed resulting in there not being enough space for the unit.
Fortunately the silencer could be tipped on its side and still work in the same way – just made installation slightly more ‘involved’ having to build a shelf for it to sit on. Added a bit more experience to my carpentry apprenticeship.
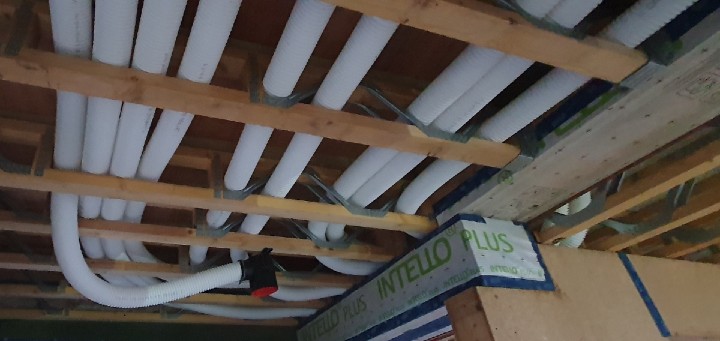
Then on to the semi rigid ducts. There is at least one duct in every room either extracting air – in the case of, for example, bathrooms and kitchen – or inputting fresh air – in the case of the living spaces and the bedrooms. With lots of nice joists to feed the ducts through, the majority of the task wasn’t too difficult. Unfortunately, however, because of the connection between the flat roof section of the house and the main eaves section, it wasn’t quite so straightforward. In the flat roof part the ducts are outside the airtight layer and therefore they have to feed through into the airtight main house section without leaking any air. One of those jobs that definitely would have been easier with a couple of people, but with only me on hand, it just took quite a long time (pretty much 2 days for 10 ducts) to tug them through.
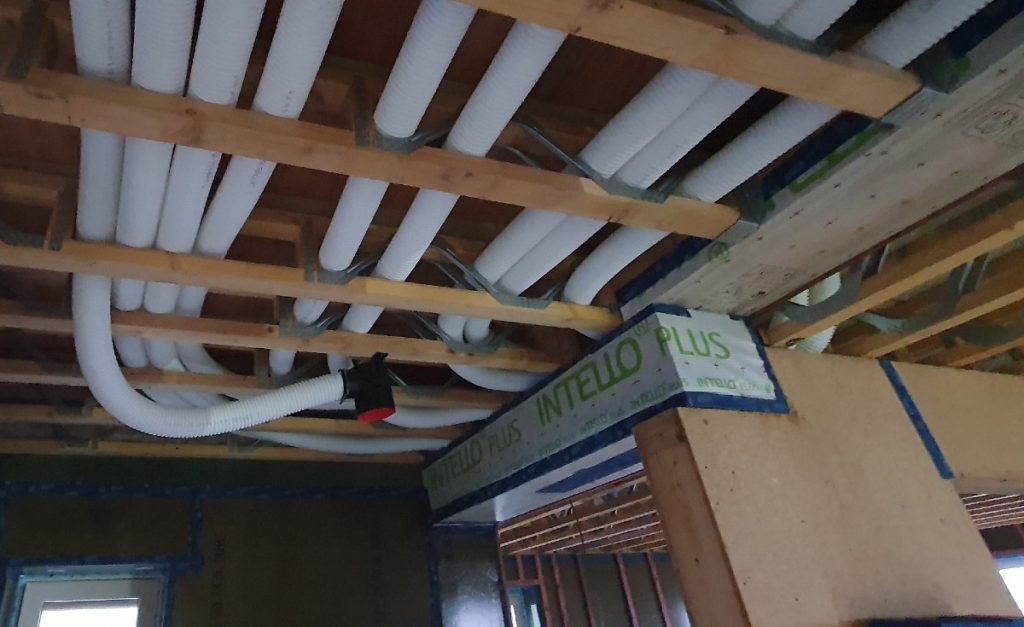
(In my slight defence, video was made to show MVHR designer, to check that I’d installed it all correctly)